Fast Shipping Available
Fast Shipping Available

A broken exhaust manifold bolt on a 6.7L Power Stroke isn't just an inconvenience. For your shop, it becomes a labor sink that can consume 8 to 16 hours of billable time if handled incorrectly. We've seen technicians spend entire days drilling, heating, and fighting a single seized bolt without making real progress.
The financial impact extends beyond labor hours. When a bolt breaks deep in the manifold, the risk of collateral damage escalates quickly. A slip with a drill bit can crack the manifold itself, requiring a full replacement rather than a repair. On diesel trucks, exhaust manifolds run between $800 and $2,200 depending on the engine configuration. Add in unexpected downtime, customer frustration, and the possibility of liability issues, and a single broken bolt repair job can easily cost your shop $3,000 to $5,000 in lost productivity.
The 6.7L Power Stroke presents unique challenges because these bolts live in an exceptionally harsh environment. Exhaust gases reach temperatures near 1,200 degrees Fahrenheit, creating intense thermal cycling that bonds corrosion and seized threads. Diesel fuel sulfur content accelerates oxidation, making these bolts particularly stubborn compared to gasoline engine equivalents.
Beyond the immediate repair, repeat failures become common when technicians rush or use suboptimal methods. Improper extraction can leave micro-fractures in remaining bolt material, leading to premature failure and a customer returning a few months later with the same problem.
Standard bolt removal techniques rarely work on 6.7L manifolds because diesel engines present a combination of factors that traditional approaches don't address. Heat application, for instance, sounds logical but often backfires on diesel engines. When you apply a torch to an exhaust manifold bolt, the heat distributes unevenly across the casting. The manifold expands faster than the bolt, actually increasing tension rather than relieving it. We've watched technicians spend 30 minutes with a torch only to find the bolt even more stuck than before.
Penetrating oils are another common starting point that disappointed shops rely on too heavily. While conventional penetrants like PB Blaster or ATF-acetone soaks work adequately on passenger vehicles, diesel manifold bolts resist them. The corrosion layer is often so thick and multi-layered that oil never reaches the actual thread interface. You apply the penetrant, wait 24 hours, and the bolt still snaps.
Manual extraction attempts frequently fail because they lack the focused force needed for diesel-level seized fasteners. A standard bolt extractor or left-hand drill bit will spin out without grabbing because the bolt head is already partially corroded or rounded. Impact drivers help but lack the controlled force necessary without damaging surrounding cast iron.
The real problem is that 6.7L manifolds demand a methodology designed specifically for the material properties and corrosion patterns unique to diesel engines. One-size-fits-all approaches leave bolts partially extracted, bolts broken even further, or manifolds cracked beyond repair.
We designed our exhaust manifold extraction systems around what actually works on 6.7L Power Stroke engines. Our approach combines specialized bit geometries, controlled force application, and a staged methodology that removes the guesswork from your shop's repair workflow.
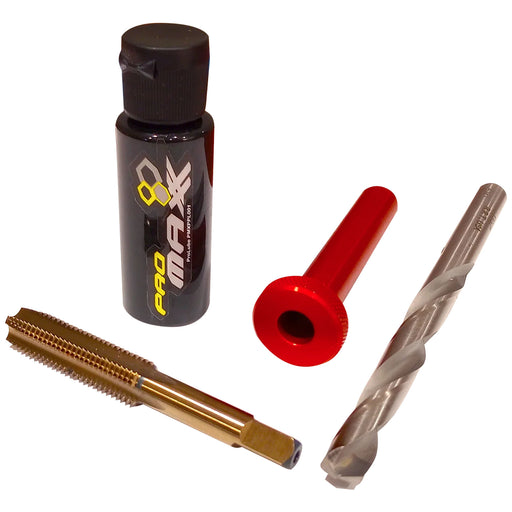
The core of our system uses ultra-hardness drill bits that grip corroded, partially rounded bolt heads without spinning out. These bits feature a reverse-helix design that pulls material away instead of pushing it deeper into the manifold. The bit diameter matches the Power Stroke bolt specification exactly, preventing the tool from wandering and damaging adjacent bolt holes.
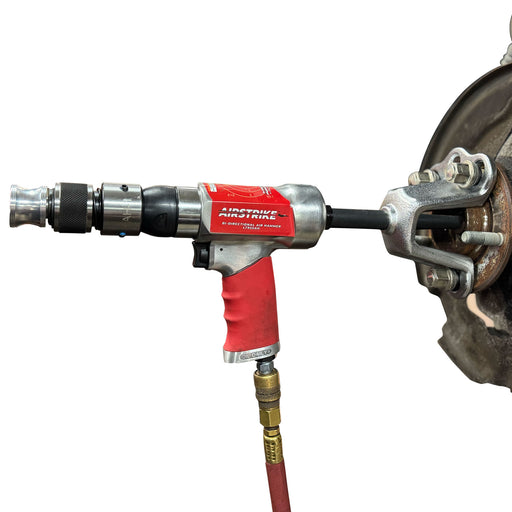
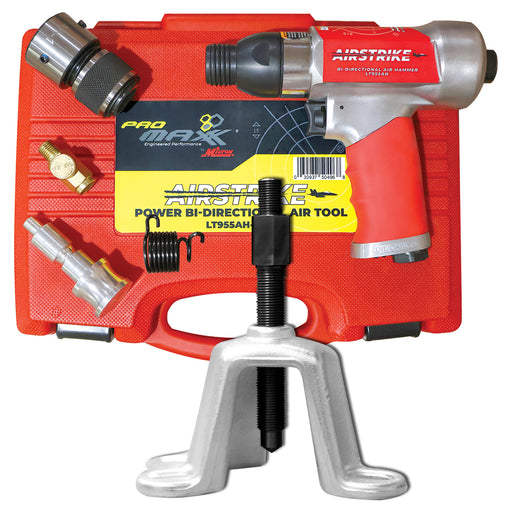
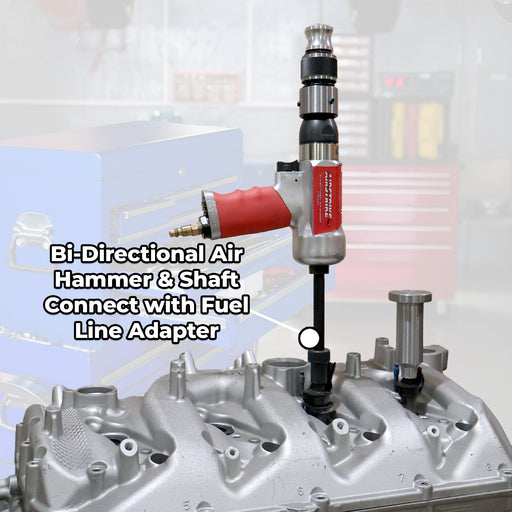
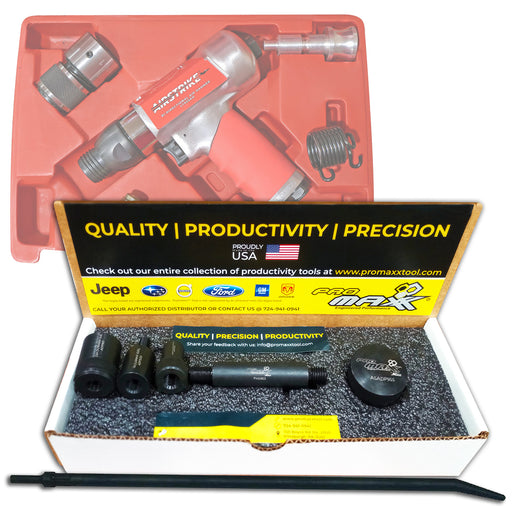
Our extraction kits pair these bits with an air hammer powered system that delivers rapid, controlled strikes rather than continuous grinding pressure. This impact methodology breaks the corrosion bond at the thread interface without the heat-related problems you encounter with torch work. The air hammer drives the specialized bit downward with consistent force while allowing micro-movements that separate seized rust.
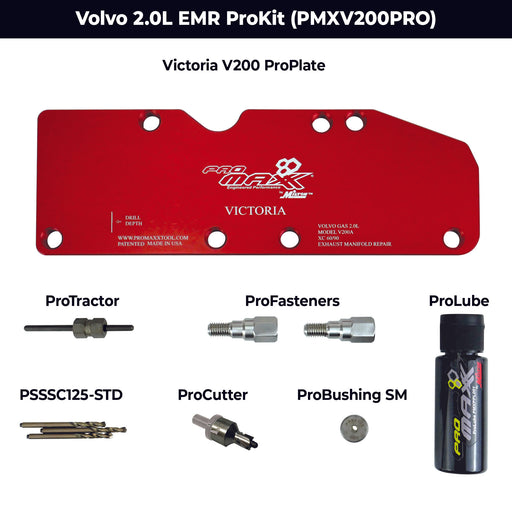
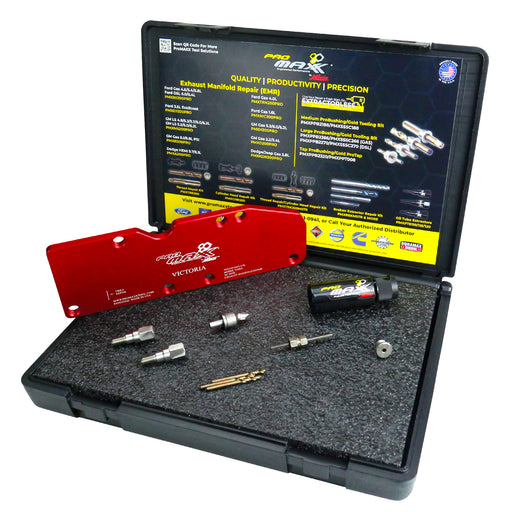
For customers working with multiple Ford diesel engines, our 6.7L Power Stroke bolts kit addresses the specific bolt patterns and corrosion signatures of these engines. The kit includes everything needed for a complete job without hunting for adapters or workarounds mid-repair.
What sets this approach apart is repeatability. Once your technicians understand the staged process, extraction times drop from the typical 8-16 hours down to 2-4 hours per manifold, even on severely corroded engines.
Before extracting anything, spend 15 minutes properly assessing the bolt condition. This upfront evaluation prevents wasted time and protects your margin.
Start by visually inspecting each bolt for corrosion severity and any prior repair attempts. Note whether the bolt head is intact, rounded, or partially broken. Take a photo for your work order. Many shops skip this step and end up with three bolts extracted cleanly and one bolt that requires a completely different approach because they didn't identify the variation.
Next, attempt a preliminary wiggle test using a properly sized wrench. Apply moderate hand pressure in both directions. If the bolt moves slightly, you're working with partial seize. If it doesn't move at all, you're working with full corrosion bond. This distinction matters because it affects your tool selection and force application strategy.
Measure the manifold casting for cracks using a magnifying glass and bright light. Hairline cracks running from bolt holes are common on high-mileage trucks. Identify these before extraction because they change your methodology. A cracked manifold sometimes requires partial disassembly or modified holding techniques during bolt removal.
Finally, check the manifold mounting surface where it connects to the engine block. Corrosion buildup or gasket material hardened into the surface affects reassembly and can lead to exhaust leaks if not addressed. Document what you find so your technician knows what cleanup work follows bolt extraction.
This assessment phase takes less than 20 minutes but prevents surprises that cost you hours later.
Proper setup reduces extraction time and prevents tool damage. Start by securing the engine block with appropriate jack stands or engine cradles. An exhaust manifold repair requires your technician to work with controlled force, and a shifting engine block creates safety hazards and tool breakage.
Next, protect adjacent components. Plastic intake manifolds, wiring harnesses, and sensors live inches away from exhaust manifolds on 6.7L Power Strokes. Wrap these areas with heat-resistant tape or repositionable aluminum foil. A slip with an air hammer can crack a plastic manifold or damage wiring, creating a secondary repair job.
Clean the surrounding bolt area with a wire wheel to remove loose corrosion and paint. You don't need a perfectly polished surface, but loose debris interferes with bit engagement and can be ejected during extraction. Remove approximately 1/4 inch of corrosion around each bolt head.
Position your air compressor setup for consistent pressure delivery. We recommend 90-100 PSI for most 6.7L manifold work. Check your compressor capacity beforehand. Undersized compressors that cycle constantly during extraction introduce pressure fluctuations that reduce bit performance and increase technician fatigue.
Arrange your extraction kit components within arm's reach. You'll need the air hammer, appropriate drill bits for your manifold bolt size, and marker pencils for reference alignment. Lay these out in a logical sequence so your technician isn't hunting for tools during the job.
With preparation complete, extraction follows a controlled three-phase sequence designed specifically for diesel engine corrosion.

Phase one involves impact force application without rotation. Position your air hammer bit against the seized bolt at a 90-degree angle to the manifold surface. Engage the air hammer and apply steady pressure for 15-30 seconds. The rapid impacts break corrosion bonds at the thread interface without trying to spin the bolt. This differs fundamentally from drilling where rotation is the goal. Here, impact is the mechanism.
After this initial impact sequence, apply a penetrating agent specifically formulated for diesel corrosion. Standard oils don't penetrate the heavily oxidized layer on 6.7L bolts. Use a product designed for seized manifold fasteners. Wait 2-3 minutes while the agent seeps into newly fractured corrosion layers.
Phase two begins with a specialized reverse-rotation attempt. Using our extraction bits, position the tool and apply gentle backward pressure while delivering light air hammer impacts. The combination of impact and slight rotation often breaks the remaining corrosion without forcing the bolt or breaking it further. If you feel movement, continue with light pressure for 2-3 rotation cycles. If there's complete resistance, stop immediately and move to phase three.
Phase three applies sustained directional impact. Reposition your bit at 90 degrees and increase air hammer intensity to medium pressure. Deliver impacts for 20-30 second intervals, pausing every 10 seconds to reapply penetrant. This phase gradually enlarges the extraction path. After 3-4 iterations, the bolt typically loosens enough for removal with a standard socket and wrench.
Throughout this process, your technician should feel gradual movement progression. If a bolt remains completely stuck after 90 minutes of work, reassess whether hidden corrosion or a prior repair attempt is complicating the job. Sometimes removing an adjacent bolt first opens space for better tool angle and access.
Once a bolt breaks free from corrosion, careful extraction prevents threads from tearing or bolt material from breaking away mid-removal. Use a properly sized socket, never an oversized wrench that can slip and damage the bolt head.
Apply steady, controlled pressure as you unthread the bolt. If you encounter resistance mid-rotation, stop and tap the bolt gently with a hammer to break remaining corrosion, then continue. Avoid powering through resistance, which can shear the bolt near the mounting surface.
As the bolt emerges, inspect the extracted threads immediately. Look for stripped threads, corrosion patterns that indicate previous partial extraction attempts, or material deformation. This observation guides your replacement strategy. Occasionally, severely damaged threads require helicoil insertion rather than direct replacement with a stock bolt.
Before installing a replacement bolt, clean the hole thoroughly. Use a brass wire brush sized to fit the bolt hole, then flush with compressed air. Any corrosion or debris left in the hole causes the new bolt to seat improperly or seize prematurely.
Your replacement bolt must match OEM specifications exactly. 6.7L Power Stroke exhaust manifold bolts are typically grade 8 fasteners with specific head sizes and thread pitch. Using a slightly undersized or incorrect grade bolt creates failure risk. Stock the correct bolt specifications and verify against your vehicle service manual before installation.
Apply a thin coat of anti-seize lubricant to the replacement bolt threads. This makes future removal easier and prevents rapid re-corrosion. Use a product rated for high-temperature exhaust applications, not general-purpose anti-seize which breaks down in extreme heat.
Tighten the replacement bolt to specification, typically 32-35 ft-lbs on 6.7L manifold bolts. Use a calibrated torque wrench for accuracy. Under-tightening creates exhaust leaks. Over-tightening on fresh castings risks stripping threads again.
After all bolts are replaced, a pressure test verifies your repair's integrity before the truck returns to the customer. A failing exhaust manifold creates exhaust leaks that customers notice immediately, often leading to warranty claims and reputation damage.
Cool the manifold to room temperature (at least 30 minutes after reassembly), then apply 30 PSI shop air pressure through the exhaust outlet with the engine off. Block all other exhaust openings with caps or tape. Use soap solution around each bolt perimeter to detect leaks.
Bubbles forming around any bolt indicate an incomplete seal. This usually means insufficient torque, debris under the bolt head, or threads damaged during removal. Back the offending bolt out, clean the area, and reinstall with proper torque.
If pressure testing reveals leaks at the manifold-to-engine interface (where the gasket sits), remove the manifold and inspect the mounting surface. Often, old gasket material has hardened into the surface, preventing new gasket seating. Use a gasket scraper to clean this surface completely, then reinstall the manifold with fresh gasket material.
Verify manifold alignment by checking that mounting bolts aren't creating tension or warping. Misalignment leads to uneven bolt load distribution and premature failure. If alignment seems off, recheck that the engine block hasn't shifted and that all bolts are torqued evenly.
Shop labor represents your largest margin variable on exhaust manifold repairs. Our extraction methodology consistently reduces labor time from the industry average of 12-16 hours down to 3-5 hours, depending on bolt condition and manifold accessibility.
This time savings compounds across your year. If your shop performs 15 manifold repairs annually, the difference between traditional methods and our approach represents 135 to 165 freed-up labor hours. At typical diesel shop rates of $95-125 per hour, that's $12,800 to $20,600 in additional billable capacity annually.
Beyond the direct time savings, our systems reduce the risk of collateral damage that extends jobs unexpectedly. Cracked manifolds, damaged surrounding components, and repeat customer visits vanish when you use extraction methods designed for diesel engines.
Most shops recoup their initial investment in our extraction kit within the first 3-4 jobs, then operate profitably on subsequent repairs. Your technicians become faster and more confident with the process after 2-3 applications, further reducing labor time.
Equipment longevity matters too. Our specialized bits maintain their hardness and grip through multiple jobs. Unlike generic drill bits that dull quickly on corroded bolt material, our ultra-hardness bits remain effective across dozens of extractions.
Shops across the country rely on our extraction systems for their daily 6.7L Power Stroke repairs. One shop in Texas reported reducing their average manifold repair from 14 hours to 3.5 hours after implementing our methodology, allowing them to accept more repair jobs and increase technician utilization.
A diesel specialist in Colorado documented that their extraction success rate improved from roughly 60% (with some jobs requiring full manifold replacement) to 98% using our kit approach. This reliability translates directly to predictable job estimates and customer satisfaction.
A fleet maintenance operation in Oklahoma found that adopting our system eliminated repeat customer visits for exhaust leaks on manifold repairs. Their warranty call-back rate dropped from 8% to less than 1%, reducing administrative overhead and improving reputation metrics.
One shop owner in Michigan reported that equipment investment paid for itself within two months of adoption, freeing capital for other shop improvements while reducing the frustration technicians experienced with traditional extraction methods.
These results aren't outliers. They reflect what happens when you match your tool methodology to the specific material properties and corrosion patterns of 6.7L Power Stroke engines.
Your next manifold repair can follow this workflow immediately. Start by ordering our extraction kit matched to your typical customer base, review the staged methodology with your team during a slow shop period, and document your labor hours on the first 2-3 jobs to establish your baseline improvement. Most shops see meaningful time reduction on the very first application, with even better results as technicians develop proficiency with the technique.


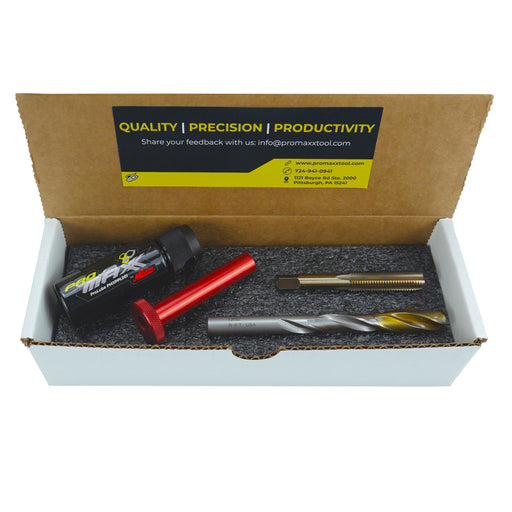
Ford 3.5 Ecoboost Harmonic Balancer Bolt Puller Kit: PMXCSR035KIT - ECO• Compatible with Ford 3.5L Bolt Part: HL3Z-6A340-A & F5RZ-6A340-B• May ...
VIEW MORE
For Saturday delivery or special shipping instructions, please contact ProMAXX Tool M-F 8 a.m. – 5 p.m. EST at 724-941-0941. Expedited Orders Placed by 1pm EST will be Processed Same Day | UPS Ground Processing Time is 1-3 Business Days

Offering a range of policies

Contact our support team today
724-941-0941

1121 Boyce Road
Suite #2000
Pittsburgh, PA 15241
Any motor company logo on this site is a Registered Trademark. ProMAXX Tool is not affiliated with any of the motor companies on this site.
Leave a comment